
Everyone says the iPhone just works out of the box. Then you open Settings on a new iPhone 16 Pro and find Significant Locations quietly keeping a log of the places you go.
Cross-app tracking requests are allowed, and any app can ask for your whole photo library.
The defaults look harmless until you check them. "Apple insiders" here does not mean a leaked memo. No Apple employee was interviewed for this piece. These are buried power-user settings, documented by Apple under Face ID & Passcode, Privacy & Security, Accessibility, Phone, and Battery.
Sixteen of them, each with its exact path, the catch that comes with it, and who it actually helps. Change them and you close privacy leaks, cut daily taps, and slow battery wear without crawling Apple's support site.
Do one today: account security, privacy cleanup, daily speed, or battery care. Pick the situation that fits you.
| Setting | Where it lives | Catch | Payoff |
|---|---|---|---|
| Stolen Device Protection | Settings > Face ID & Passcode | One-hour delay away from familiar places | Blocks a thief with your passcode |
| Advanced Data Protection | Settings > iCloud | Recovery depends on trusted devices | End-to-end encryption for iCloud data |
| Tracking Requests | Settings > Privacy & Security > Tracking | Removes tracking, not ads | Cuts the IDFA profiling path |
| Apple Advertising | Settings > Privacy & Security > Apple Advertising | Separate from third-party tracking | Stops Apple personalizing ads |
| Safety Check | Settings > Privacy & Security > Safety Check | Reset can break apps that rely on access | One-tap permission reset |
| Limited Photo Access | App's Photos permission screen | New photos must be added manually | Send one photo without the roll |
| Limited Contacts Access | App's Contacts permission screen | New contacts must be added later | Messenger sees a handful of contacts |
| Significant Locations | Settings > Location Services (bottom) | Separate from app location permissions | Erases the phone's own frequent-place log |
| Back Tap | Settings > Accessibility > Touch > Back Tap | Thick cases can fire it accidentally | One-handed screenshot or camera |
| Action Button | Settings > Action Button | Loses its current job | Physical shortcut to your most-used tool |
| Lock Screen Widgets | Long-press Lock Screen > Customize | Maximum of four widgets | Glanceable weather and battery |
| Live Voicemail | Settings > Apps > Phone > Live Voicemail | Device-dependent toggle | Read a voicemail as it is left |
| Screen Unknown Callers | Settings > Phone > Screen Unknown Callers | Some real callers hang up | Robocalls filtered with a transcript |
| Live Captions | Settings > Accessibility > Live Captions | On-the-fly captions mishear names | Captions for any audio |
| Vehicle Motion Cues | Settings > Accessibility > Motion | Only activates in a moving vehicle | Less nausea in the car |
| Charge Limit | Settings > Battery | Less runtime per charge | Slows battery wear from sitting at 100% |
1. Stolen Device Protection for Account Changes

A thief who watches you type your passcode can change your Apple Account password and switch off Find My in under a minute.
Your account, your backups, your location trail: gone before you reach for your phone. Stolen Device Protection is the toggle that stops that handover cold.
The path: Settings > Face ID & Passcode > Stolen Device Protection. Turn it on. Apple added it in iOS 17.3, and iOS 17.4 brought an Always option for the delay.
The catch: away from a familiar location, sensitive changes wait one hour. If a delay is already running, you wait it out. Always applies the delay even at home, so a routine password change needs a fresh hour.
The payoff: changing the Apple Account password or turning off Find My is blocked until that hour passes. That is a one-hour buffer between a stolen passcode and a locked-out owner. If only one toggle gets done, this is it.
💡 Tip: Set the delay to Always if you travel often. The minute of friction at home is worth the protection on a train.
⚠️ COMMON MISTAKE
Do not batch these blind
The most common mistake is flipping every privacy switch at once, then wondering why a photo app cannot save edits. Do them in the order above and check one app at a time.
2. Advanced Data Protection for iCloud

Prompt to copy
I am turning on Advanced Data Protection on my iPhone 16 Pro and want the recovery set up before I flip the switch. Walk me through what I need ready: which trusted devices should be signed in, how many recovery contacts to name, and where I store the recovery key so it survives a lost phone. List the steps in order, name each one the way the iPhone labels it, and tell me the single step people most often skip. Keep it under 250 words and skip anything that does not affect recovery.
Paste that into a chat assistant before you touch the setting. It comes back in about 20 seconds, and it is there to organize your preparation, not to replace Apple's own support page.
The path is in iCloud settings on the iPhone, then Advanced Data Protection. You want a trusted device signed in and a recovery key stored somewhere off the phone. Let the assistant sequence the checklist, then follow Apple's page for the exact screen.
Without the switch, iCloud Backup, Photos, Notes, Reminders, Safari bookmarks, Siri Shortcuts, Voice Memos and Wallet passes sit outside end-to-end encryption. Apple can read them, and can be ordered to hand them over.
The catch: once the switch is on, Apple genuinely cannot get your data back. No support call restores it.
Lose your trusted devices and your recovery key in the same month, and those photos are gone.
So do the recovery setup first, and check it by signing in on a second device before you trust it.
With the switch on, those same categories plus 17 more become unreadable to Apple. A stolen passcode gets an attacker into the account. It does not get them into the data, and that is the difference worth an evening.
💡 Tip: Print the recovery key and store it somewhere that is not your phone. A screenshot in Photos is useless if the phone is the thing that is lost.
3. Tracking Requests Switched Off
The job is stopping apps from asking to follow you across other companies' apps and sites. That permission feeds an advertising identifier called the IDFA, a number that lets advertisers tie your behavior in one app to your behavior in the next.
The old way, apps ask the moment you open them, and most people tap allow to make the box go away. Each tap adds your IDFA to another company's profile of you.
The new way is Settings > Privacy & Security > Tracking, where you switch Allow Apps to Request to Track to off. One toggle retires every future request.
With the path cut, advertisers and data brokers find it substantially harder to stitch your activity together across apps. The profiles they build get thinner and cheaper to ignore.
The catch: no ads vanish. You still see the same banners, served from less about you. This switch ends the tracking permission. Apple's own ad personalization lives in a separate screen and needs its own toggle.
The privacy and battery terms, decoded
4. Apple Advertising Personalization Off
The ad settings are spread out, so most people turn off one tracking option and assume the job is done.
Apple runs a second ad system of its own, and it lives in a different menu. The path is Settings > Privacy & Security > Apple Advertising, where Personalized Ads goes off for good.
With it off, Apple stops using your activity to pick the ads shown in the App Store and Apple News. This is a separate pipeline from third-party tracking, and it does not remove ads from Apple's apps. The count of ads stays the same.
The cost is thirty seconds and one revisit if an update resets it. What you get back is a small thing: Apple's own ad system no longer builds a profile of your reading and downloading habits. That is the second ad path closed.
💡 Tip: Do entries 3 and 4 back to back while you are already in Privacy & Security. They live two taps apart.
5. Safety Check Permission Reset

Three years of app installs leaves dozens of small permissions attached to apps you barely open. One has your camera, another your microphone, a third your contacts.
None of them announce themselves, and the list is spread across dozens of app screens, so nobody builds the whole picture by hand.
Safety Check at Settings > Privacy & Security pulls that picture into one screen: apps, the data they can reach, and who you share with. It also resets every app permission in one tap.
That is the catch. A one-tap reset can strip an app that genuinely needs access, so read the sharing list first and note what each permission is feeding.
Used in that order, it is a fast lever after a breakup, a lost phone or a cleanup. Old access goes away in seconds instead of an evening of hunting.
6. Limited Photo Access for Apps

First, tell the permission screen that the app gets specific images, not the library. The setup takes about two minutes per app, and it holds from then on.
The next time an app asks for Photos, do not tap Allow. The screen offers Full Access, Limited Access, Add Photos Only and Private Access. Limited Access hands over only the pictures you pick.
Private Access means the app never sees the camera roll at all. Add Photos Only lets it save images without browsing yours.
The catch is upkeep. Under Limited Access, every new photo goes in by hand, and Private Access means no browsing at all.
That is a fair trade for a wallpaper app. Do the two-minute setup on the apps that asked for the whole roll in week one.
💡 Tip: Switch a photo editing app to Add Photos Only. It can save edits without ever seeing the rest of your library.
7. Limited Contacts Access for Messengers
The catch comes first: Limited Access does not stay limited on its own. Add a new client next month and the messenger still cannot reach them until you revisit the permission screen and tick the name.
Expect the app to miss people you assumed it knew.
The safe way starts when the app first asks. Decline full access, choose Limited Access, and hand over four or five names: family, a boss, your closest friend. Signal or WhatsApp then delivers messages to those people and sees nothing else in your address book.
Contacts sit beside photos as the other permission that quietly asks for everything. Take a messenger you installed to reach one client.
On an iPhone 16 Pro, by hand you scroll the whole list to find that one name, about 40 seconds. Limited Access gets you to the same conversation in about 10, edits included.
💡 PRO TIP
The narrow-grant habit
Once you have done entries 6 and 7, make it permanent: any new app that asks for Photos or Contacts gets Limited Access first. Re-granting takes seconds; unreleasing a copied contact list takes months.
8. Significant Locations Cleared Out

Significant Locations is a log inside the iPhone that records the places you visit often, and it runs without anyone choosing to keep it. The phone builds this history itself, separate from whatever permission any single app holds.
To find it, open Settings, then Privacy & Security, then Location Services, and scroll to the bottom of that page. Tap Significant Locations, enter your passcode, and you will see the addresses the phone has kept. Many readers find a dozen or more.
Turning the toggle off stops new entries. To erase what is already stored, use the Clear History button on the same screen. Do both. Off alone leaves the old log sitting there, and a cleanup that keeps last year's addresses has not cleaned up much.
The limit worth knowing: this switch governs the phone's own frequent-place history, not any app's location access. An app you granted location to still tracks on its own schedule. Repeat the check per app another day, and the phone-level log stays closed.
9. Back Tap for Screenshots

Two taps on the back of an iPhone 16 Pro can replace a careful reach for the side and volume buttons. That is the whole idea behind Back Tap, and it takes about 30 seconds to set up.
Open Settings, then Accessibility, then Touch, and scroll to Back Tap at the bottom. Choose Double Tap or Triple Tap and pick Screenshot, Camera, Flashlight, or Control Center from the list. Then test it with your usual case on.
Prompt to copy
I tap the back of my iPhone 16 Pro to trigger Screenshot and Camera. That combination is now too easy to fire by accident, and a thick case makes it happen. List five quick actions people assign to Back Tap that almost never trigger by mistake, one line each, with why it resists pocket pressure.
A thick case or pressure in a pocket can set it off, so test double tap and triple tap against each other before settling. If screenshots keep appearing, move the action to triple tap and hand double tap something harmless.
10. Action Button for Camera or Voice
One press can open the camera, turn on the flashlight, or start a voice memo instead of leaving the button on a function you never touch.
The setting lives at Settings > Action Button, and the list also offers a Focus mode, Magnifier, or a Shortcut you built.
Assigning it takes about a minute. Deciding takes longer, because the button stops doing its current job the moment you pick a new one. Choose the single action you reach for every day, not the one that sounds clever.
Cost check: nothing to buy, no subscription, and no battery penalty worth counting. The price is the old job, gone. The camera costs no reach, the flashlight fires at night, and a voice memo starts without a home-screen stop.
💡 Tip: A Shortcut tied to the Action Button can log a note to an app or start a focus mode you use for work. It is the most flexible option on the list.
Daily-speed settings at a glance
📸 Back Tap
Settings > Accessibility > Touch
🔘 Action Button
Settings > Action Button
🔒 Lock Screen widgets
Up to four
📞 Call screening
Ask Reason for Calling
The pattern
Each of these replaces a reach, an unlock, or a ring with a gesture you already have a finger for.
11. Lock Screen Widget Stack

Checking the weather, your battery percentage, and the next meeting means tapping the phone awake, swiping or scanning your face, then opening two or three apps. That is roughly fifteen seconds, repeated a dozen times a day, for facts you only glance at.
The Lock Screen holds up to four widgets, so those facts sit in view before any tap. Press and hold the Lock Screen, tap Customize, then Add Widgets. Weather, battery, calendar, and other supported data are the usual picks.
The catch is the four-widget ceiling. Adding a calendar widget can mean dropping the battery ring you rely on, so decide which two facts you check most and let the rest stay one tap away.
Before and after: three apps opened per check becomes one glance at the first screen. Weather, battery, and the next event are readable before you even pick the phone up. That is a few seconds back every time you look.
12. Live Voicemail Transcription

The toggle is device-dependent. Open Settings > Apps > Phone > Live Voicemail, and if the switch is not there, this iPhone does not support the feature and there is nothing to change.
Step 1: Open Settings and tap Apps. Scroll to Phone, tap it, and look for Live Voicemail near the top of that page.
Step 2: Turn Live Voicemail on. The switch shows green, and the phone now transcribes a message as the caller speaks it.
Step 3: Let an unknown call ring through to voicemail. The transcription appears on the Lock Screen while the caller is still talking, so the call can be picked up or left to finish.
An unrecognized number rings through to voicemail, and without the feature the message waits until the reader has time to listen. Reading the text as it lands takes a glance, not a call.
13. Unknown Caller Screening
Prompt to copy
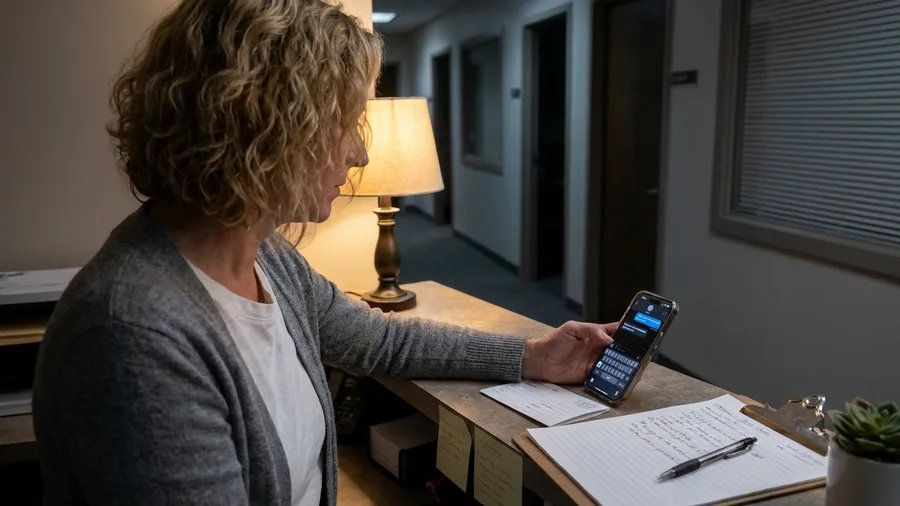
Write a short voicemail transcript script for an iPhone 16 Pro running iOS 26.5 that screens unknown callers. When a number not saved in Contacts calls, the iPhone should answer, ask the caller to say who they are and why they are calling, and show me a live transcription. Give it in 80 words or fewer, in a calm phone-operator voice, with one line that tells the caller to hang up if they do not want to leave a reason.
Pass that prompt to ChatGPT and it returns the wording in a few seconds. On the phone, the switch is at Settings > Phone > Screen Unknown Callers, with Ask Reason for Calling chosen. The default still rings through or drops straight to voicemail.
For more of these quick setups, see new ways people use ChatGPT in daily routines.
Not every real caller will state a reason. That helps: robocalls go quiet, and the checkout line needs no review. But a delivery driver or a doctor's office may hang up instead. So read the live transcript before you assume it was spam.
What comes back is the caller's spoken reason, transcribed as the phone answers for you. You decide with context instead of a bare number. Unknown calls now filter themselves, and a real caller who explains gets through.
Permissions: the default vs the narrow grant
Default permission
- App sees every photo in the camera roll
- App sees every contact in the address book
- One tap and you are done
- Access persists until you remember to revoke it
Narrow grant
- App sees only the photos you pick
- App sees only the contacts you pick
- One extra step the first time
- New photos and contacts must be added later
14. Live Captions for Any Audio

Open Settings and pick Accessibility, then Live Captions. Text starts appearing under any audio the phone handles: a muted video on a train, a podcast in a loud kitchen, a call, a conversation across a table. Nothing needs captions baked in first.
It writes that text live as people speak, so a name or an accent can come out wrong.
Check the transcript before you act on anything said in a critical call. In a noisy room or on mute, though, your eyes now follow what your ears cannot.
15. Vehicle Motion Cues for Car Rides
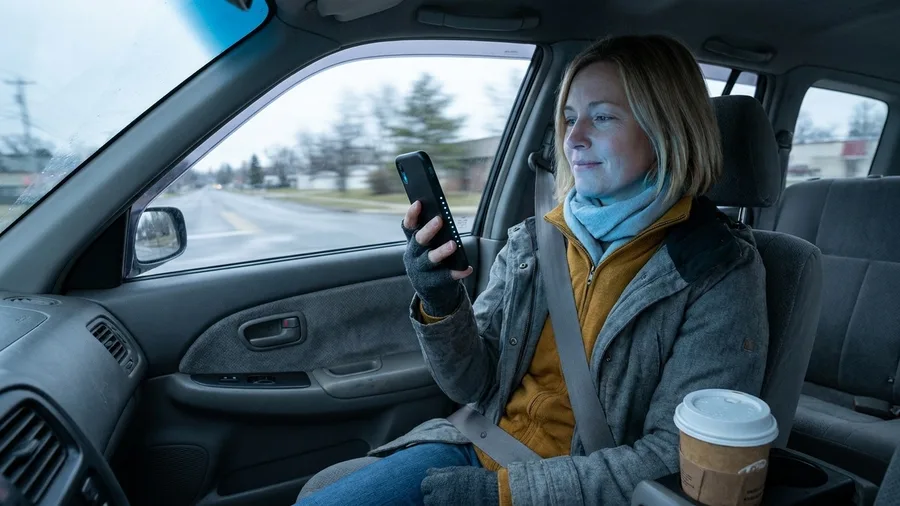
About 20 minutes into a car ride, reading on the phone turns the stomach, so the screen goes dark for the rest of the trip.
Vehicle Motion Cues is turned on at Settings > Accessibility > Motion, set to Automatic. Small dots then move along the screen edges in sync with the car.
The catch is the word Automatic. It only switches on when the iPhone detects a moving vehicle, so it will not help with nausea at a desk or on a boat.
Used as intended, a passenger reads or watches with less nausea, and the phone earns its hours in the passenger seat. The screen stops going unused the moment the car pulls away.
16. Charge Limit at 80 to 90 Percent

Why the phone wears out: a battery that spends hours plugged in at 100% ages faster than one that rests lower. Charge Limit is the fix, and it starts in Battery settings. Apple's support page has the exact menu.
The cap is set anywhere from 80% to 100% of capacity, so 80% to 90% is the useful range for a phone that sleeps on a charger overnight.
If your days are long and your outlets are rare, a lower cap buys wear at the cost of runtime.
iOS 26.4 adds a Shortcuts action that switches the limit by location or network, so a home cap of 80% and an away cap of 100% can run hands-off. Apple's support page spells out that automation step by step.
That range cost is the real trade. At 80%, a heavy day can end with the phone dead before you do, so check your own screen-on time before you drop the cap. If a charger is always within reach, the trade is worth it.
🧭 The order to work through the 16
Lock the account
Turn on Stolen Device Protection and set the delay to Always if you travel.
Encrypt iCloud
Set up two recovery contacts, then turn on Advanced Data Protection.
Close the ad paths
Switch off Tracking requests and Apple Advertising personalization.
Review permissions
Run Safety Check, then re-grant only the apps you use daily.
Narrow the grants
Set Photos to Limited Access and Contacts to Limited Access for new apps.
Add daily speed
Set Back Tap, the Action Button, Lock Screen widgets, and call screening.
Cap the battery
Set Charge Limit to 85% and revisit it after a month.
Frequently Asked Questions
Do these settings work on an older iPhone?
Most do, but a few are device-specific. Stolen Device Protection needs iOS 17.3 or later. Live Voicemail only appears if your device supports it. Advanced Data Protection and Safety Check are available more broadly. Check the settings app on your phone before assuming a toggle is missing.
Will turning off tracking break any apps?
No. Turning off Allow Apps to Request to Track stops the permission prompt and the IDFA path, but apps still work. You will still see ads. If a specific app misbehaves after the change, check its individual privacy settings.
Is Advanced Data Protection safe if I lose my phone?
It is safe if you set up a recovery contact or recovery key and store it somewhere other than the phone. Without that, Apple cannot help you recover the data. Set up recovery first, then turn the feature on.
Which setting should I do first if I only have five minutes?
Stolen Device Protection. It is the only one on the list that stops a thief with your passcode from taking over your Apple Account. Everything else can wait a day; that one cannot.
Do I need to pay for any of this?
No. All 16 are built into iOS 26.5 and cost nothing. Advanced Data Protection requires a paid iCloud storage plan only if you use more than the free storage tier, but the encryption feature itself is not a separate purchase.
Four situations, one toggle to do first
If account security is your worry, the first toggle is Stolen Device Protection. If you are doing a privacy cleanup, start with Tracking requests and Apple Advertising, then run Safety Check.
For daily speed, Back Tap and the Action Button give the most back for the least effort.
For battery care, start with Charge Limit at 85% and check battery health after a month. You do not have to do all 16 today. Do the one that matches your situation, then come back for the rest.